White Point
Setting the White Point (Highlight) Target Values
When you set the White Point Target values, you are adjusting the image’s tonal range to match the capabilities of the printer and media combination you are using. You will then select the part of the image you want to be the white point. This will be the area in the image where the first discernible amount of ink appears, and therefore the first tone after the paper base white. This process also neutralizes the image based on the area you select as the white point. Because of this, it is critical that the area be neutral to begin with; otherwise, the color will shift improperly. For more on selecting White Points, see White Point Parameters.
Curves for White Point
Go Layer > New Adjustment Layer > Curves.
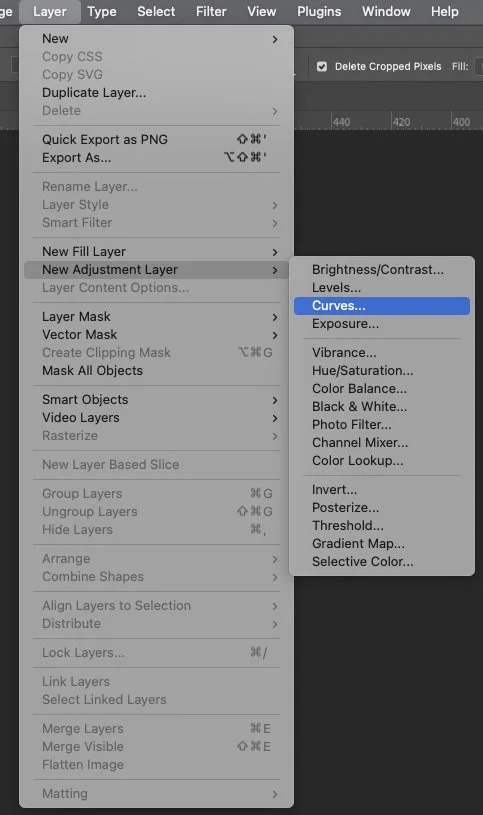
Create a New Curves Adjustment Layer
Make sure the Mode is set to Normal. Three of the six adjustment layers (White Point, Color Cast, and Vibrance) are created in Normal mode so they affect the color relationships in the images. The other three adjustment layers (Black Point, Density, and Contrast) are created in Luminosity mode to have a lesser effect on color.
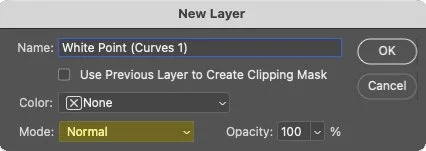
White Point New Layer
This will open the Curves Dialog Box.
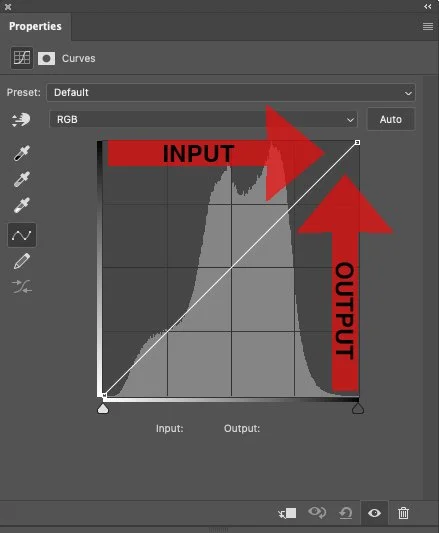
The Curves Dialog Box plots Input versus Output.
On the next page, we will look at value readout and the five Tone System Tones in Curves.
Next Page • Page 1 • Page 2 • Page 3 • Page 4 • Page 5 • White Point • White Point Parameters • Six Steps of CC